10 Smart Steps to Upgrade Your IKEA Lamp with WLED and ESP32
Looking to breathe smart lighting life into an affordable IKEA lamp? The SKAFTSÄRV model is a perfect candidate for a DIY conversion that adds WiFi control, RGB colors, and automation—all for a very low cost. In this guide, we'll walk through ten key points to transform this fixed-light accent lamp into a fully customizable smart device using an ESP32 board and WLED firmware. Whether you're a beginner or a seasoned maker, these steps will help you achieve a stylish, connected lamp that integrates seamlessly with your smart home.
1. Meet the IKEA SKAFTSÄRV Lamp
The SKAFTSÄRV is an economical LED accent lamp from IKEA, featuring a built-in diffuser and stand. Its main drawback: only fixed lighting options. You get a single color temperature and brightness level out of the box. However, its 30-LED strip and compact design make it an ideal base for a smart lighting upgrade. The lamp is surprisingly cheap, so you don't mind experimenting with it. See the components needed to turn it into something much more flexible.
2. Why Choose This Lamp for a DIY Project?
Several factors make the SKAFTSÄRV a smart choice: it comes with an integrated diffuser that softens the light, a stable stand, and a pre-wired LED strip. All you need to do is replace the simple control board. The cost is low—both the lamp and the required electronics are budget-friendly. Additionally, the housing can be opened (with some effort) to access the internal components, and the design allows for easy installation of a new controller. This makes it a beginner-friendly mod that yields professional-looking results.
3. Essential Components for the Upgrade
To complete the conversion, you'll need:
- IKEA SKAFTSÄRV lamp (the base unit)
- ESP32-C3 Super Mini board (or any ESP32-based board)
- WLED firmware (open-source software for LED control)
- USB cable and power source
- Soldering iron and wire (for connections)
- Glue or adhesive to reseal the lamp
The ESP32 board replaces the original controller, providing WiFi connectivity and programmability. Learn how to configure WLED for optimal performance.
4. Opening the Lamp Safely
Getting inside the SKAFTSÄRV requires breaking the glued seams that hold the housing together. Use a spudger or a thin knife to gently pry apart the plastic parts. Be careful not to crack the diffuser or damage the LED strip. Once open, you'll see the original control board connected to the 30-LED strip (WS281x type, GRB color order). Disconnect it carefully. This step is the most delicate, but taking your time ensures a clean opening. Next, you'll install the new board.
5. Installing the ESP32-C3 Super Mini
After removing the old controller, solder the ESP32-C3 Super Mini board to the LED strip's data, power, and ground connections. The physical fit is snug—the board is small enough to nestle inside the lamp's housing without protruding. Double-check the wiring: WS281x LEDs use a single data line with 5V and GND. Once soldered, secure the board with a dab of hot glue, then carefully close the lamp back up. The result is a clean interior that looks almost stock.
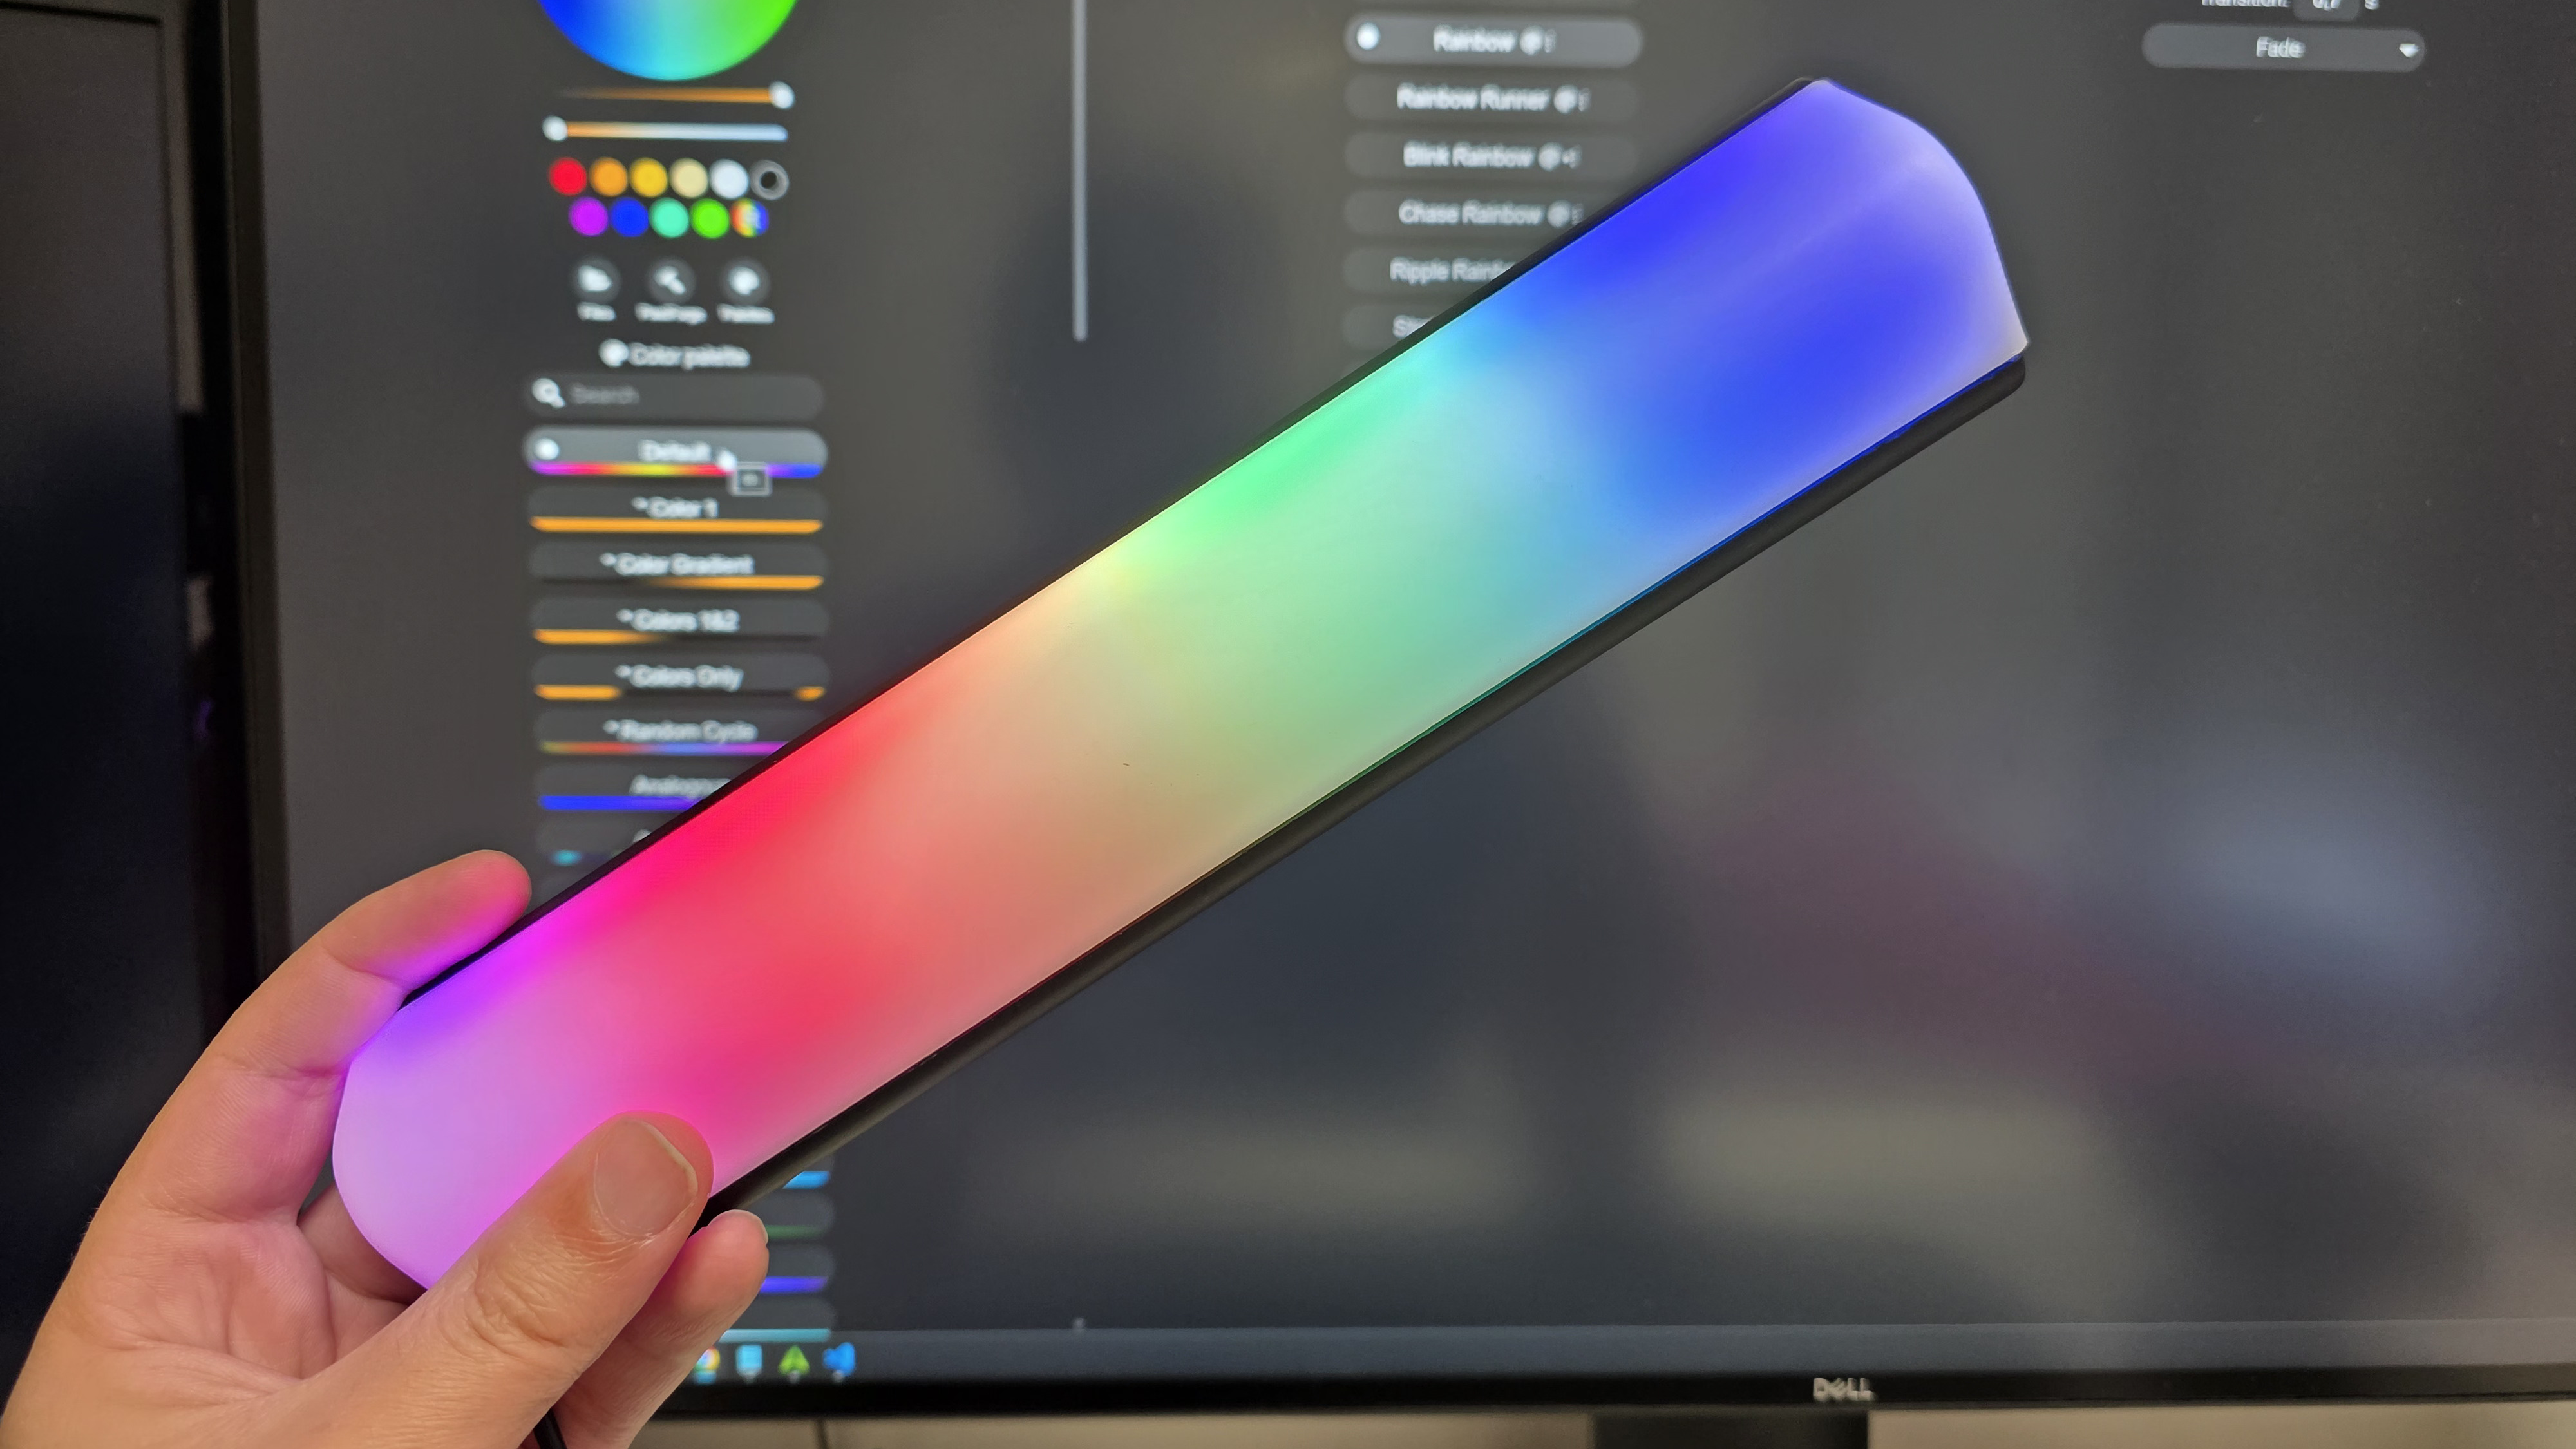
6. Configuring WLED for 30 LEDs
Flash WLED onto the ESP32 board using the web installer or a USB-to-serial adapter. After booting, access the WLED web interface and configure the settings:
- Set LED count to 30.
- Choose WS281x as the LED type.
- Set color order to GRB (matches the lamp's strip).
- Enable WiFi to connect to your network.
WLED's interface offers hundreds of effects, timers, and even sync capabilities. Discover how WLED enhances control.

7. Unlocking WLED's Smart Features
WLED is open-source software that turns your lamp into a fully featured smart device. Key features include:
- Native apps for Android and iOS for quick control.
- Automation via timers, sunrise/sunset, and sensor triggers.
- Integration with Home Assistant via MQTT or API.
- Voice control through Alexa or Google Assistant.
- Custom effects like rainbow, fire, or music sync.
All these make the modest SKAFTSÄRV a powerhouse of ambient lighting.
8. Integrating with Home Assistant
One of the biggest benefits of WLED is its seamless integration with Home Assistant. Simply add the WLED integration via the Home Assistant UI, and your lamp appears as a light entity. You can then include it in automations, scenes, or dashboards. For instance, set the lamp to turn on at sunset with a warm orange glow, or blink notifications based on sensor events. This level of control was impossible with the original fixed lamp.
9. Comparing with Other IKEA Mods
This isn't the first IKEA lighting mod. The pixel-style OBEGRÄNSAD wall lamp, for example, comes with limited canned animations but can be upgraded with a new controller for more effects. The SKAFTSÄRV mod is simpler because it uses a standard LED strip rather than a pixel matrix. Both projects show how IKEA's affordable designs can become flexible smart lights with a small investment of time and money.
10. Final Results and Why You Should Try This
After completing the mod, you'll have a stylish accent lamp with a built-in diffuser and mount that responds to WiFi commands. It's fully configurable via WLED, integrates with your smart home, and cost far less than a commercial smart RGB lamp. The project is rewarding for beginners and experienced makers alike—just follow the steps above. Thanks to the lamp's low cost and the open-source ecosystem, this upgrade is a no-brainer for anyone wanting to dip their toes into smart lighting DIY.
In conclusion, upgrading an IKEA SKAFTSÄRV with an ESP32 and WLED is a straightforward project that dramatically improves functionality. You gain full RGB control, automation, and smart home integration for a fraction of the price of a comparable retail smart lamp. Plus, you get the satisfaction of building it yourself. Give it a try—your evenings will never be the same.
Related Articles
- Zara Cyberattack: 197,000 Customers' Data Compromised in Major Breach
- Senior Scattered Spider Hacker Pleads Guilty: ‘Tylerb’ Admits Role in Major Cyberattacks
- Dark Web Takedowns and AI Threats: A Cybersecurity Analysis Guide
- Snowden Leaks: Former NSA Chief Chris Inglis on Mistakes, Insider Threats, and Media Disclosures
- 6 Critical Lessons from the CPU-Z Watering Hole Attack: How SentinelOne Stopped a Supply Chain Breach
- Frontier AI Sparks Race in Cyber Defense: SentinelOne Reveals How Machine-Speed Autonomy Stops Zero-Day Threats
- Russia-Linked Hackers Hijack Routers to Steal Microsoft Office Authentication Tokens: Q&A
- 10 Essential Facts About Modern Secret Management on Kubernetes with Vault